

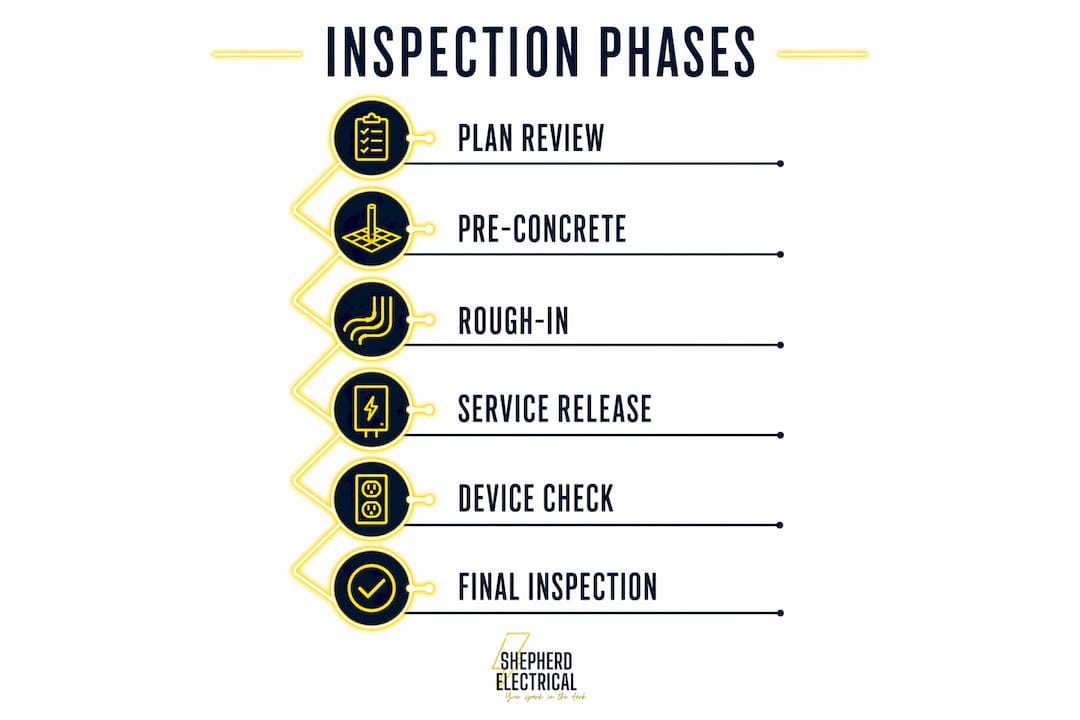
Electrical inspections follow a defined sequence of staged checks: plan review, underground/pre-concrete (when applicable), rough-in, service/meter, device/branch circuits, and final/energization. Each phase exists to verify code compliance at the exact moment when the work is still visible and correctable. Skip a phase or cover wiring too early, and you risk costly wall demolition, failed occupancy, or a utility that won’t connect your meter.
Here’s the standard phase sequence at a glance:
- Plan review — permit issued after plans are approved
- Underground/pre-concrete — conduit and cable checked before backfill or concrete pour
- Rough-in — all wiring, boxes, and cable support verified before insulation or drywall
- Service/meter inspection — panel and service equipment cleared before utility energizes
- Device/branch circuits — receptacles, switches, and fixtures confirmed before final cover
- Final/energization — completed system tested with GFCI/AFCI checks, labeling, and CO sign-off
Your immediate next step: contact your local Authority Having Jurisdiction (AHJ) or permit office to confirm which phases apply to your specific project.
Table of Contents
- What is an electrical inspection and who enforces it?
- How do the electrical inspection phases work, step by step?
- What do inspectors actually check at each phase?
- How long do inspections take, and what happens if you fail?
- What are the most common inspection failures and how do you fix them?
- When do you need special or additional inspections?
- How to get your site ready before the inspector arrives
- Why local AHJ rules change everything about your inspection
- Key Takeaways
- What the crew at Shepherd Electrical sees most often
- Shepherd Electrical gets your project inspection-ready in Edmond and North OKC
- Useful sources and how to find your local AHJ rules
- FAQ
What is an electrical inspection and who enforces it?
An electrical inspection is a code-compliance verification, not a performance test. An inspector confirms that the installation meets the minimum safety requirements set by the adopted electrical code. What they are not doing is running insulation-resistance tests, arc-flash analysis, or load-flow studies. Those specialized performance tests are the contractor’s or a commissioning firm’s responsibility.
The entity that runs inspections is the Authority Having Jurisdiction, or AHJ. The AHJ concept is defined in NFPA 70 Article 90.4 and gives the local authority broad legal power to interpret code, approve or reject installations, and issue final occupancy sign-off. The AHJ might be a city building department, a county inspector, a state electrical board, or even a utility in some rural areas. The point is that the AHJ’s word is final on your project.
Common inspection triggers include:
- Permit-driven new construction or major remodels
- Service upgrades or panel replacements
- Pre-sale or buyer-requested home inspections
- Utility requirements before meter reconnection
- Periodic maintenance inspections under NFPA 70B (primarily commercial/industrial)
The scope of each inspection shifts depending on the trigger. A permit-driven rough-in covers every wire run in the walls. A pre-sale inspection is a general condition review with no permit attached. Knowing which type you’re dealing with tells you exactly what the inspector will and won’t check.
Pro Tip: Before pulling a permit, call your local AHJ and ask which NEC edition they’ve adopted and whether they have local amendments. Oklahoma municipalities sometimes run a cycle or two behind the current NEC, and that affects which AFCI and GFCI requirements apply to your project. See the electrical code compliance guide for a quick reference on NEC editions.
How do the electrical inspection phases work, step by step?
Residential inspections most commonly use two core phases: rough-in and final. Larger projects — new construction, service upgrades, underground runs — add more stages. Here’s how the full sequence plays out.
1. Plan review and permit issuance
Before any wire gets pulled, the permit office reviews your plans. For simple residential work, this might be a one-page diagram. For a service upgrade or new build, it includes load calculations and a one-line diagram. The permit is issued only after plans are approved, and the approved plans must stay on-site for every subsequent inspection.
2. Underground or pre-concrete inspection
Not every project has this phase, but when it does, it’s non-negotiable. If conduit or cable runs underground — under a slab, through a trench to a detached garage, or beneath a driveway — the inspector must see it before backfill or concrete. Once it’s buried, there’s no way to verify conductor type, burial depth, or conduit integrity without digging it back up.
3. Rough-in inspection
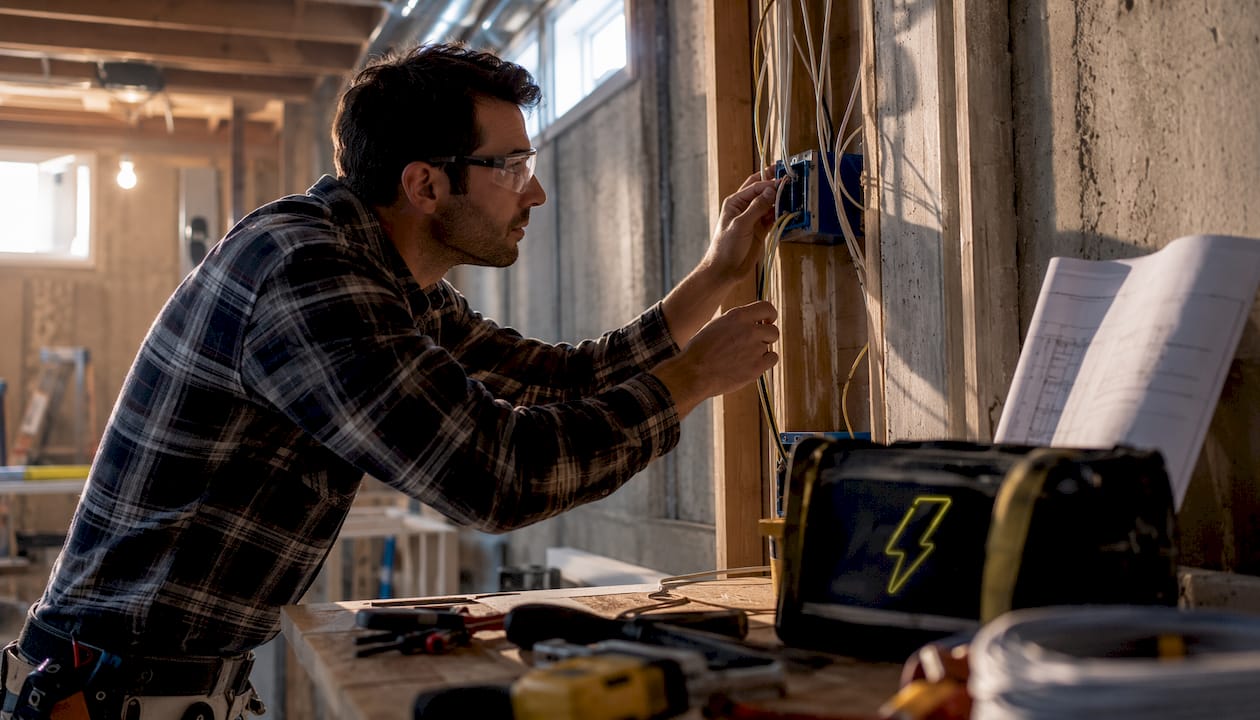
This is the most critical phase for most residential projects. The rough-in happens after all wiring, boxes, and cable support are in place but before insulation or drywall goes up. The inspector checks the bones of the system: cable type, box fill, staple spacing, nail plate protection, grounding and bonding methods, and whether required circuits are present per the approved layout.
Serious errors are easiest to catch here. Wrong cable routing, missing nail plates, oversized breakers planned for undersized conductors, and missing required receptacle locations all show up at rough-in. Passing this stage is a meaningful milestone.
Pro Tip: Never allow drywall or insulation to go up before the rough-in is signed off. If wiring is covered before inspection, the homeowner is typically responsible for reopening walls at their own expense. That’s a hard rule in most jurisdictions, including Oklahoma.
4. Service/meter inspection (service release)
Projects involving a new service, panel upgrade, or meter change require a separate service-release inspection before the utility will reconnect power. The inspector verifies the service entrance, panel, grounding electrode system, and main disconnect. After approval, the AHJ issues a release, and the utility schedules the reconnect. This step involves coordination between the contractor, the AHJ, and the utility — which is why service upgrades often take longer than homeowners expect.
5. Device and branch circuit inspection
Some jurisdictions require a separate device inspection after receptacles, switches, and fixtures are installed but before final cover plates go on. Others roll this into the final. Check with your AHJ. When it’s a separate phase, the inspector confirms device installation, box fill with devices in place, and proper GFCI/AFCI protection at required locations.
6. Final inspection and energization
The final inspection happens after all devices, fixtures, breakers, cover plates, and labeling are complete. This is not just a visual walk-through. The inspector tests GFCI and AFCI protection, checks panel labeling, verifies accessible junction boxes, confirms tamper-resistant receptacles where required, and checks that the system as built matches the approved permit scope. A CO (certificate of occupancy) or final sign-off follows a passing final.
Special and additional inspections
Certain projects add phases beyond the standard sequence:
- Solar and battery backup — utility interconnection agreements and additional AHJ documentation
- EV charger installations — load calculations, dedicated circuit confirmation, sometimes utility coordination
- Generator and transfer switch — service-release and interlock verification
- Pool and spa wiring — bonding inspections are separate and specific; see the hot tub electrical hookup requirements for a local example
- Temporary power — a separate inspection before a construction panel can be energized
What do inspectors actually check at each phase?
The table below maps each phase to the items inspectors most commonly verify. Use it as a preparation reference before scheduling each inspection.
| Phase | Key Inspector Checks |
|---|---|
| Plan review | Load calculations, circuit layout, service size, one-line diagram accuracy |
| Underground/pre-concrete | Conduit type, burial depth, conductor size, conduit fill, pull boxes accessible |
| Rough-in | Cable type and support, box fill (without devices), staple spacing (NM cable: every 4.5 ft, within 12 in. of boxes), nail plate protection, grounding/bonding conductors spliced and pigtailed, required circuit locations per approved plan |
| Service/meter | Service entrance conductor size, weatherhead clearance, main disconnect rating, grounding electrode system, bonding jumpers, panel enclosure condition |
| Device/branch circuits | Device installation, box fill with devices, GFCI protection at required locations (bathrooms, kitchen, garage, exterior, basement), AFCI protection on bedroom and living area circuits |
| Final | GFCI/AFCI function tests, panel labeling complete, cover plates installed, accessible junction boxes, tamper-resistant receptacles, fixture support, NEC 110.26 working space at panel, CO smoke detector wiring where required |
Before each inspection, have the following on-site:
- Approved permit posted visibly
- Approved plans (full set, not a photocopy)
- Labeled panel schedule (even a pencil draft helps at rough-in)
- All boxes open and accessible (rough-in)
- Devices and cover plates installed (final)
- Clear 36-inch working space in front of the panel (NEC 110.26)
Pro Tip: A 10-minute self-inspection with a receptacle tester and tape measure can catch up to 80% of common failures before the official inspector arrives. At rough-in, open every box and check staple spacing. At final, test every GFCI and AFCI breaker. That one step alone prevents most reinspections.
How long do inspections take, and what happens if you fail?
Typical inspection durations
Residential inspections move faster than most homeowners expect. A standard rough-in runs 15–45 minutes for a single-family home; a final inspection typically takes 10–30 minutes. Complex projects with multiple subpanels, specialty circuits, or large square footage take longer, but the inspector is usually in and out within an hour for most residential scopes.
Scheduling wait times vary more than the inspection itself. Some AHJs offer next-day slots; others run a week or more out, especially during busy construction seasons. Request your inspection as soon as the phase is ready, not the morning you want it.
Reinspection fees and the correction process
Reinspection fees vary by jurisdiction. Some AHJs charge a flat fee per reinspection; others include one reinspection in the original permit fee and charge for subsequent visits. The only reliable way to know your local fee is to call the permit office directly or check their online portal.
After a failed inspection, the process is:
- Receive the correction list from the inspector (written or digital)
- Have a licensed electrician address every item on the list
- Document corrections with photos when possible
- Request reinspection through the AHJ portal or phone line
- Pay any applicable reinspection fee before the visit
- Do not cover or conceal any corrected work until the reinspection passes
A failed inspection is a normal part of the permit lifecycle, not a penalty. The reinspection process exists to give contractors and homeowners a path to correct issues. What it is not is optional: uncorrected failures can block occupancy, trigger stop-work orders, or require demolition of covered work.
Statistic to know: A brief self-inspection before the official visit can catch up to 80% of common failures — which means most reinspections are preventable with a 10-minute walk-through before the inspector arrives.
What are the most common inspection failures and how do you fix them?
Most failed inspections come down to a short list of recurring problems. A licensed electrician can correct all of them, but knowing what to look for before the inspector arrives saves time and money.
Common rough-in failures:
- Box fill violations — too many conductors in a box for its cubic-inch rating. Fix: swap to a larger box or reduce conductors.
- Missing nail plates — cables passing through studs within 1.25 inches of the face need steel nail plates. Fix: install the plates before drywall.
- Improper staple spacing — NM cable must be stapled within 12 inches of every box and every 4.5 feet along the run. Fix: add staples where spacing exceeds limits.
- Grounding conductors not spliced — at rough-in, all equipment grounding wires in boxes must be spliced and pigtailed, even if devices aren’t installed yet. Fix: splice and pigtail before the inspection.
- Missing required circuit locations — kitchen small-appliance circuits, bathroom circuits, and garage circuits are required by the NEC regardless of what the homeowner requests. Fix: add the missing circuits per the approved plan.
Common final failures:
- Missing GFCI protection — bathrooms, kitchens, garages, exteriors, and unfinished basements all require GFCI. Fix: install GFCI receptacles or a GFCI breaker on the affected circuit.
- Missing AFCI protection — bedrooms and most living areas in newer NEC editions require AFCI breakers. Fix: replace standard breakers with AFCI-rated units.
- Unlabeled panel — every breaker must be labeled clearly. Fix: label every circuit before the final.
- Incorrect breaker sizing — a 20-amp breaker on 14 AWG wire is a code violation. Fix: match breaker size to conductor ampacity.
- No working space at panel — NEC 110.26 requires 36 inches of clear depth in front of the panel. Fix: remove any storage or obstruction before the inspector arrives.
For troubleshooting issues that surface after inspection, like dead outlets or flickering lights, the correction process is the same: document, fix, reinspect.
Pro Tip: When corrections are made, photograph each item before covering it. A timestamped photo of the corrected nail plate or spliced ground wire gives the inspector confidence and speeds the reinspection. Keep a copy with the permit file.
When do you need special or additional inspections?
Some projects add inspection phases that most homeowners don’t anticipate. Planning for them upfront prevents schedule surprises.
Service-release and utility coordination
A service upgrade or new meter installation requires AHJ sign-off before the utility will reconnect. The inspector approves the service equipment, issues a release, and the utility schedules the reconnect separately. In the OKC area, that utility coordination step can add days to the timeline. For panel upgrades and meter work, the service-release inspection is non-negotiable before power is restored.
Underground and trench inspections
Any conduit or cable that runs underground must be inspected before backfill. This applies to runs to detached garages, outbuildings, landscape lighting circuits, and pool equipment. The inspector checks burial depth, conduit type, and conductor sizing. Schedule this inspection immediately when the trench is open, not after the concrete truck is on its way.
EV chargers, solar, and generators
These projects often add a layer of utility coordination on top of the standard AHJ inspection. An EV charger installation typically requires a dedicated circuit inspection and sometimes a load calculation review. Solar and battery backup systems require utility interconnection agreements and may involve a separate utility inspection. Generator interlock and backup wiring requires a service-release inspection to verify the transfer equipment.
Some jurisdictions also require periodic maintenance inspections under NFPA 70B for commercial equipment. That’s separate from permit-driven inspections and follows a different scheduling cycle.
How to get your site ready before the inspector arrives
Preparation takes less time than a reinspection. Run through this checklist before every scheduled visit.
Documents and access:
- Post the approved permit where the inspector can see it immediately
- Have the full approved plan set on-site, not a phone photo
- Bring a labeled panel schedule, even a hand-written draft
- Clear a 36-inch path to the panel (NEC 110.26)
At rough-in:
- Open every electrical box so the inspector can see inside
- Verify staple spacing along every cable run
- Confirm all grounding conductors are spliced and pigtailed in boxes
- Check that nail plates are installed wherever cable passes within 1.25 inches of a stud face
- Do not install insulation or drywall until the rough-in is signed off
At final:
- Install all devices, cover plates, and fixtures before the inspection
- Test every GFCI outlet by pressing the test button and confirming it trips
- Test AFCI breakers using the test button on the breaker itself
- Label every circuit in the panel clearly
- Confirm all junction boxes are accessible, not buried behind drywall
Self-check before any phase:
- Walk the job with the approved plan and compare what’s installed to what was approved
- Use a receptacle tester at final to confirm polarity and GFCI function
- Review the home electrical inspection guide for a full pre-inspection checklist
The residential wiring workflow article covers how these preparation steps fit into the broader construction sequence if you want the full picture.
Why local AHJ rules change everything about your inspection
The NEC is the national baseline, but no AHJ is required to adopt it verbatim. Every jurisdiction can amend, add to, or delay adoption of NEC editions. That means the AFCI requirements that apply in one Oklahoma city may not apply the same way in the next county over. The AHJ has broad authority to interpret code and apply local amendments, which is why early AHJ contact is the single most effective way to avoid inspection surprises.
Common local variation examples that affect inspections:
- A jurisdiction still on the 2017 NEC has narrower AFCI requirements than one on the 2023 edition
- Some AHJs require a separate device inspection; others roll it into the final
- Local amendments may require arc-fault protection in areas the national NEC doesn’t mandate
- Utility coordination requirements for service releases vary by provider
The practical reality: The NEC sets the floor, but your local AHJ sets the actual rules for your project. A licensed electrician who works regularly in your jurisdiction knows which amendments are in play and which inspectors look for what. That local knowledge is worth more than any generic checklist.
How to confirm your local rules:
- Call the permit office and ask which NEC edition is currently adopted
- Ask specifically about local amendments affecting AFCI, GFCI, and service equipment
- Check whether the AHJ offers online permit portals for scheduling and status tracking
- For complex projects, request a pre-permit plan review meeting with the AHJ
Pro Tip: When in doubt on a complex project, ask for a pre-permit plan review. Most AHJs offer this, and it costs nothing. An hour with the plan reviewer before you pull the permit can prevent a failed inspection that costs a week of schedule and a reinspection fee. For local guidance specific to Edmond and North OKC, the safe electrical installation guide covers common local requirements.
Key Takeaways
Electrical inspections are staged so hidden wiring can be verified before finishes conceal it — rough-in and final are the two core milestones, with added phases for service, underground, or specialty work depending on the project and jurisdiction.
| Point | Details |
|---|---|
| Never cover before rough-in passes | Covering wiring before rough-in sign-off can force costly wall demolition at the homeowner’s expense. |
| Rough-in runs for a typical residential inspection duration | A standard residential rough-in inspection typically takes 15–45 minutes; final inspections usually take 10–30 minutes for a single-family home. |
| Self-check catches most failures | A 10-minute pre-inspection walk-through with a receptacle tester can catch most common failures. |
| AHJ rules vary locally | Confirm which NEC edition and local amendments apply before pulling a permit — call your permit office directly. |
| Shepherdelectricalconstruction handles inspection prep | For Edmond and North OKC homeowners, Shepherdelectricalconstruction prepares sites for inspection, corrects failed items, and coordinates reinspections. |
What the crew at Shepherd Electrical sees most often
The calls that come into Shepherdelectricalconstruction most often aren’t about brand-new construction. They’re about panel upgrades that stalled because the homeowner didn’t know a service-release inspection was required before the utility would reconnect. Or a rough-in that failed because the previous contractor covered the walls before the inspection was scheduled. Or an EV charger that needed a dedicated circuit and a load calculation the original installer skipped.
In the Edmond and North OKC area, the most common inspection-related calls involve GFCI and AFCI issues, panel upgrades, dead outlets after a remodel, and flickering lights that trace back to a connection that was never inspected. The team at Shepherdelectricalconstruction knows the local AHJ requirements, which NEC edition Oklahoma City and surrounding municipalities are running, and what each inspector typically focuses on. That local familiarity cuts reinspection rates significantly.
If you’re heading into a permitted project and want a crew that knows the inspection sequence cold, call or text (405) 406-1026 or use the online booking path to get on the schedule.
Shepherd Electrical gets your project inspection-ready in Edmond and North OKC
Passing an electrical inspection on the first visit saves time, money, and the headache of a reinspection fee. Shepherdelectricalconstruction serves homeowners in Edmond, North OKC, NW OKC, Deer Creek, The Village, Nichols Hills, Arcadia, Jones, and nearby communities with inspection-ready electrical work from permit pull to final sign-off.

The services most relevant to inspection preparation and corrections include panel upgrades and service-release coordination, GFCI and AFCI installation, dedicated circuit wiring, EV charger wiring with load calculations, and inspection-ready panel labeling. For projects that failed a rough-in or final, the team handles urgent electrical repairs and correction work so reinspection goes smoothly.
Ready to schedule? Call or text (405) 406-1026 or book online to get on the calendar. Shepherdelectricalconstruction handles the permit coordination, the inspection prep, and the corrections so you don’t have to.
Useful sources and how to find your local AHJ rules
The following sources back the guidance in this article and give you direct paths to official information for your jurisdiction.
Authoritative references:
- NFPA 70 (National Electrical Code) — the national baseline for electrical installations; your AHJ’s adopted edition governs your project. Find your state’s adopted edition through your state electrical board or building department.
- Minnesota Department of Labor & Industry electrical inspection checklist — a detailed one-family dwelling checklist that illustrates the rough-in and final requirements common across many US jurisdictions.
- LouisvilleKY.gov electrical inspections page — a clear example of how a municipal AHJ publishes inspection types, scheduling, and permit requirements.
- Jaspector electrical inspection stages — practical breakdown of rough-in, service, and final stages with homeowner-focused guidance.
- PermitDeck electrical inspection checklist — covers rough-in and final checklist items and inspection duration data.
- Simpro electrical inspection checklist for contractors — checklist categories organized by site safety, panels, wiring, devices, grounding, and documentation.
How to find your local AHJ:
- Search “[your city or county] building department electrical permits” to reach the permit office directly
- Ask for the currently adopted NEC edition and any local amendments in writing
- Request the inspection scheduling method (online portal, phone, or app) and typical wait times
- Ask about reinspection fees before you need them
Statistic to keep in mind: A 10-minute self-inspection catches up to 80% of common failures before the official inspector arrives. That single step is the most cost-effective thing you can do before any scheduled inspection.
For Edmond and North OKC projects, Shepherdelectricalconstruction is the direct resource. The electrical services overview covers the full range of inspection-related work, or call (405) 406-1026 to ask a specific question about your project.
FAQ
What are the standard phases of a residential electrical inspection?
The standard sequence is plan review, underground/pre-concrete (when applicable), rough-in, service/meter inspection, device/branch circuits, and final/energization. Most basic residential projects use rough-in and final as the two core milestones.
What does an inspector check at rough-in?
At rough-in, the inspector verifies cable type and support, box fill, staple spacing, nail plate protection, grounding and bonding conductors, and required circuit locations — all before insulation or drywall is installed.
What happens if my electrical inspection fails?
A failed inspection results in a written correction list. A licensed electrician addresses each item, and you request a reinspection through the AHJ, paying any applicable reinspection fee. Failing is a normal part of the permit process, not a penalty.
How long does a residential electrical inspection take?
A standard rough-in inspection typically runs 15–45 minutes; a final inspection takes 10–30 minutes for a single-family home. Complex projects with multiple panels or specialty circuits take longer.
What is the AHJ and why does it matter for my inspection?
The Authority Having Jurisdiction (AHJ), defined in NFPA 70 Article 90.4, is the local authority that enforces electrical codes, interprets requirements, and issues final occupancy approval. Because AHJs can adopt local amendments to the NEC, the rules in your city may differ from the next jurisdiction over — always confirm requirements with your local permit office before starting work.
Recommended
- Home electrical inspection guide: what homeowners must know
- Electrical system assessment for safer homes: 2026 guide
- What Is Electrical Preventive Maintenance for Homeowners
- Residential Electrical Troubleshooting Steps for Homeowners
Need help with this at your home?
Shepherd Electrical helps Edmond and OKC metro homeowners with troubleshooting, repairs, GFCIs, outlets, and safety inspections. Free estimates are available, and workmanship is backed by a lifetime guarantee.