

Skipping even one step during an electrical installation can mean a failed inspection, a voided homeowner’s insurance policy, or a fire inside your walls months later. Homeowners and small business owners in Edmond and Oklahoma City face the same trap: they assume electrical work is straightforward until the city inspector shows up and red-tags the job. This guide walks you through the full process, from understanding which jobs need a permit, to gathering the right tools, following the installation sequence, and passing your inspections on the first attempt.
Table of Contents
- Understanding permits and legal requirements
- What you need to get started: Tools, materials, and safety basics
- The electrical installation process: Step-by-step instructions
- Inspections, troubleshooting, and passing on the first attempt
- Why following the process beats shortcuts: Lessons from Edmond & OKC projects
- Get expert help with your electrical installation in Edmond & OKC
- Frequently asked questions
Key Takeaways
| Point | Details |
|---|---|
| Permits matter | Most new electrical installations in Edmond and OKC require permits and staged inspections to be legal and safe. |
| Preparation prevents problems | Having the right materials, tools, and safety gear is essential before starting your electrical project. |
| Step-by-step is safest | Following each phase—planning, rough-in, inspection, and finish—reduces risks and speeds up approval. |
| Inspections aren’t optional | Rough-in and final inspections are required locally; skipping them risks fines, failed work, and unsafe outcomes. |
| Expert help pays off | Licensed electricians help tackle complex or risky work and ensure full code compliance from the start. |
Understanding permits and legal requirements
Before you touch a single wire, you need to know whether your project requires a city permit. This is the step most people skip, and it’s the one that creates the most expensive problems later.
In Oklahoma City, permits are required for work such as new circuit installations, panel upgrades, and service changes. Like-for-like device replacement at the same location without circuit modification is generally permit-free. That sounds simple, but the line between “replacement” and “modification” is narrower than most people think.
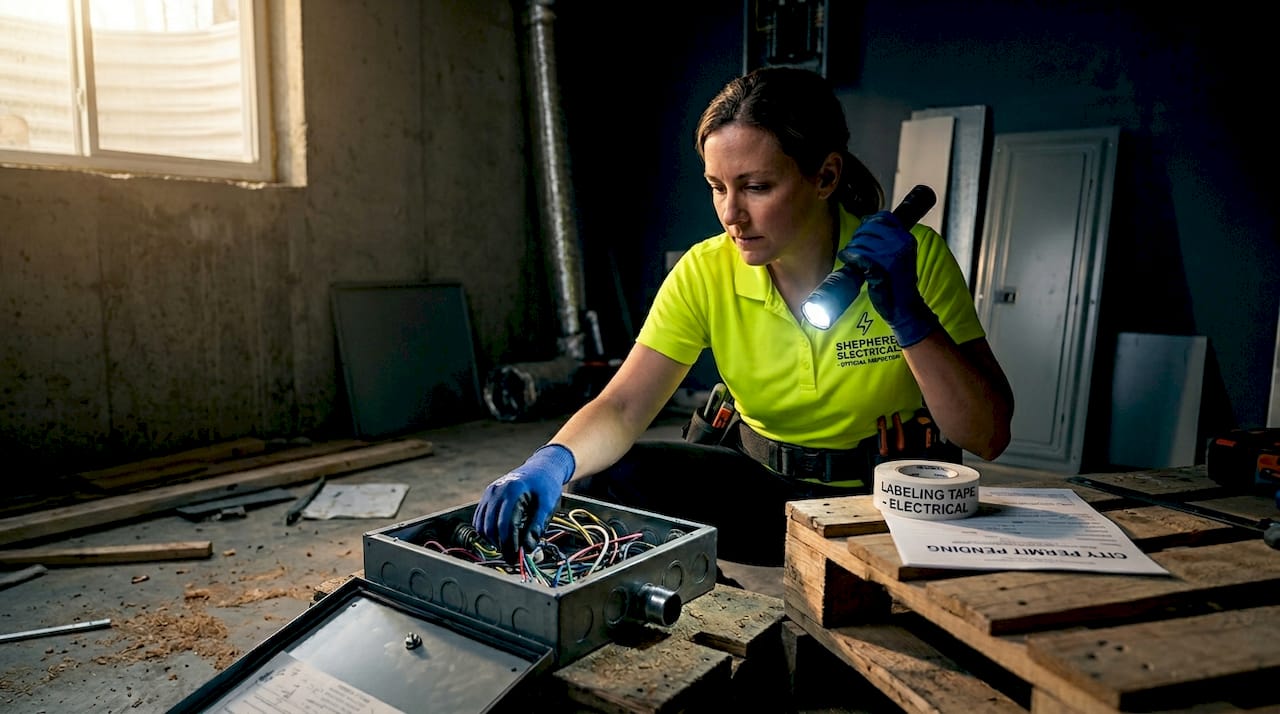
Edmond follows similar logic. Edmond’s permit guidance emphasizes that rough-in inspections check wire routing and support, box placement and sizing, grounding, proper separation of wiring types, and AFCI/GFCI identification. Final inspections check proper operation, panel labeling, and safety items like outdoor receptacle weather-in-use covers.
Even though both cities follow the National Electrical Code (NEC) as a baseline, local jurisdictions add their own layers. The Oklahoma City permitting standards make it clear that your exact scope, whether a service change, panel upgrade, or new circuit, determines your permit obligation. Always verify with your city before starting.
You can review the permit rules for Oklahoma projects and understand the full role of electrical contractors in keeping your project code-compliant from the start.
Common projects: permit required vs. permit-free
| Project type | Permit required? |
|---|---|
| New circuit installation | Yes |
| Electrical panel upgrade | Yes |
| Service entrance change | Yes |
| Adding outlets to existing circuit | Usually yes |
| Like-for-like outlet/switch replacement | No |
| Installing a ceiling fan (same location) | Usually no |
| EV charger installation | Yes |
| Outdoor lighting on new circuit | Yes |
- New circuit runs always require a permit
- Panel work requires both a permit and licensed contractor sign-off
- Service upgrades from 100A to 200A require both permit and utility coordination
- GFCI outlet replacements at the same location are typically permit-free
- Adding a subpanel requires a permit in both cities
Pro Tip: Even a simple task like moving an outlet 12 inches to accommodate a new cabinet can transform a permit-free job into a permit-required one because it involves extending or modifying the circuit.
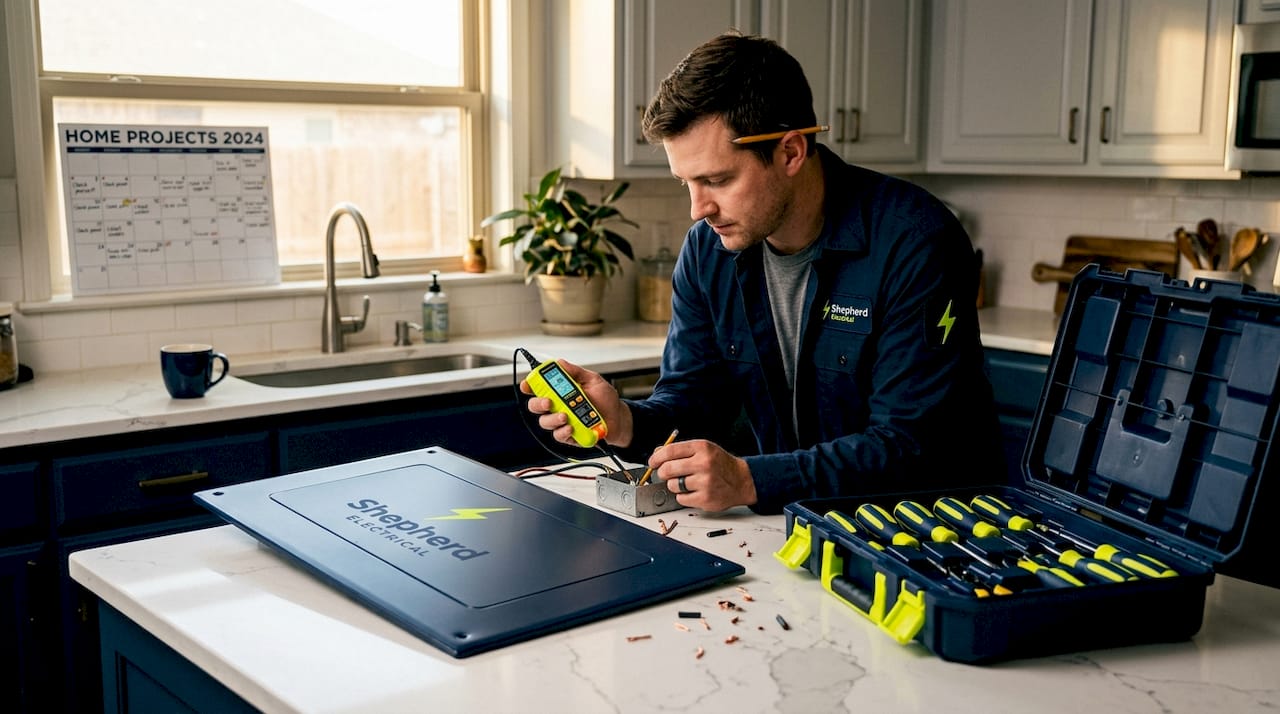
What you need to get started: Tools, materials, and safety basics
Once you know your permit status, it’s time to gather what you’ll need before a single wire is cut. Rushing out mid-project to find a missing tool is how corners get cut.
The Edmond permit guidance specifically flags that inspectors look at box sizing and wire routing during rough-in. That means your materials need to match the job from day one, not as an afterthought.
Essential tools for electrical work in Edmond and OKC
| Tool | Purpose |
|---|---|
| Non-contact voltage tester | Confirm power is off before touching wires |
| Wire stripper | Clean, accurate wire preparation |
| Fish tape | Routing wire through walls and conduit |
| Needle-nose pliers | Making precise connections in tight boxes |
| Klein Tools screwdrivers | Securing devices and panel connections |
| Multimeter | Verifying voltage, amperage, and continuity |
| Cable stapler | Proper wire securing per code |
| Box knockout punch | Clean box entry without jagged edges |
| Conduit bender | For exposed or commercial runs |
| Electric drill with bits | Running wire through framing |
Safety gear you must have:
- Insulated rubber gloves rated for your voltage
- ANSI-rated safety glasses
- Arc flash-rated clothing for any panel work
- Non-conductive work boots
- Voltage indicator lamp for panel verification
Common materials for a standard circuit installation:
- 12/2 or 14/2 NM-B (Romex) cable for 20A or 15A circuits respectively
- Single or two-gang electrical boxes (sized for fill per NEC 314.16)
- GFCI or AFCI outlets depending on location
- Wire nuts or push-in connectors
- Panel breaker sized to the circuit
- Cable staples and nail plates for protection
- Weatherproof covers for outdoor receptacles
Local code reminders matter here. Oklahoma installations in bathrooms, kitchens, garages, and outdoor areas require GFCI protection. Bedrooms and living areas on 15A or 20A circuits require AFCI breakers per current NEC standards adopted in both Edmond and OKC. Outdoor receptacles need “in-use” weatherproof covers, which inspectors specifically look for during final walkthrough.
Pro Tip: Buy 10 to 15 percent more wire than your measurement suggests. Cutting a run short inside a wall is one of the most frustrating and costly mistakes in any installation.
Check our detailed inspection checklist to make sure your materials list lines up with what local inspectors actually verify.
The electrical installation process: Step-by-step instructions
With permits pulled and materials ready, you can follow a systematic process that keeps your work safe and your inspections on schedule.
Critical safety callout: Never close up walls or cover wiring before your rough-in inspection passes. In both Edmond and Oklahoma City, covering wiring before inspection is a code violation that results in mandatory destructive removal and re-inspection fees.
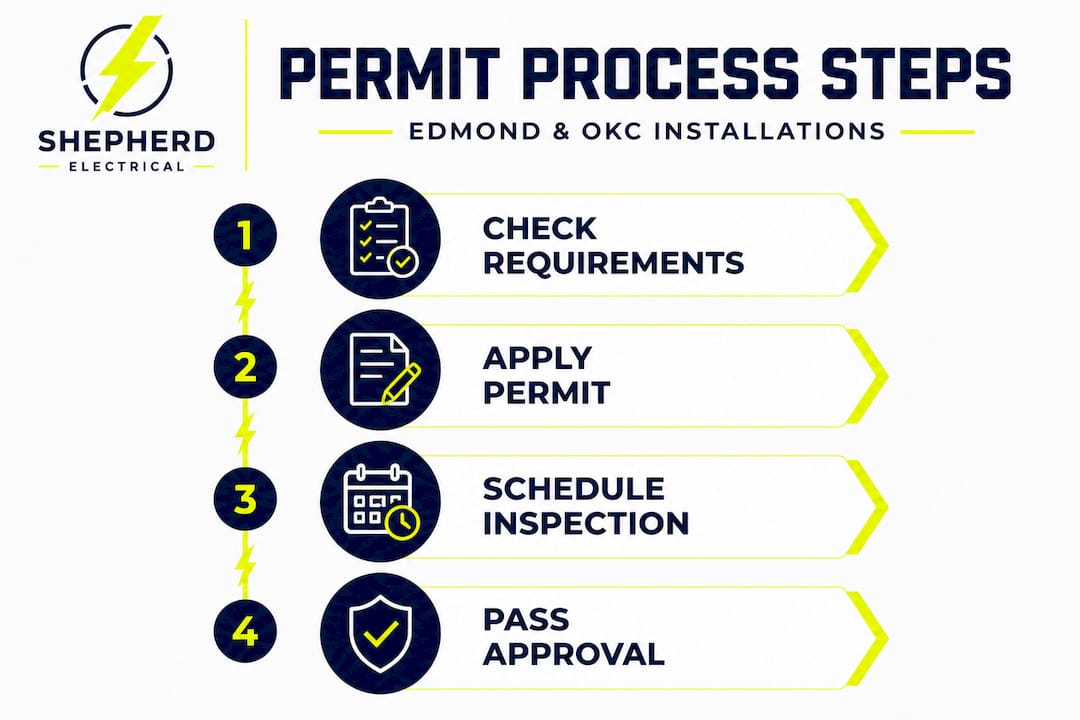
The inspection sequence in Oklahoma City requires a rough-in inspection before any wiring is concealed, followed by a final inspection after all devices are installed and tested. Edmond’s fee schedule confirms that re-inspections are charged when work is defective or incomplete, so there’s real financial cost to skipping steps.
Step-by-step installation process:
-
Plan your layout. Mark all box locations, identify your circuit routing path, and confirm box heights meet code (typically 18 inches above floor for outlets, 48 inches for switches).
-
Pull your permit. Apply through the city portal before any work begins. Keep your permit posted or accessible at the job site.
-
Shut off power at the panel. Use your non-contact voltage tester to confirm the circuit is dead before touching anything. Test twice.
-
Install electrical boxes. Secure boxes to framing or use old-work boxes for retrofit installs. Make sure each box is rated for the number of wires it will hold (box fill calculation per NEC 314.16).
-
Run your wire. Route NM-B cable through framing holes, keeping it at least 1.25 inches from the edge of studs or protecting it with nail plates. Staple every 4.5 feet and within 12 inches of each box.
-
Make your connections at boxes. Leave at least 6 inches of wire free inside each box for connection. Strip only what you need. Keep conductors grouped by circuit.
-
Label everything at the panel. Identify each circuit clearly with a permanent label before your rough-in inspection.
-
Schedule your rough-in inspection. Contact the city inspector and do not close walls until you receive approval. In Edmond and Oklahoma City, staged inspections are mandatory, and inspectors will not accept work that was concealed prematurely.
-
Close walls after rough-in approval. Only after the rough-in passes can drywall go up.
-
Install devices and fixtures. Mount outlets, switches, and fixtures. Ensure GFCI and AFCI devices are installed per code requirements for each room type.
-
Test all circuits. Use your multimeter and GFCI tester to verify every device operates correctly before calling for final inspection.
-
Schedule final inspection. Final walkthrough covers device operation, panel labeling, outdoor cover presence, and overall code compliance.
Pro Tip: Take dated photos of all wire routing, staple locations, and box fill before drywall goes up. If a question comes up during inspection or years later, you’ll have documentation that shows the work was done correctly.
For a deeper breakdown, see our complete residential installation guide and our panel upgrade step-by-step resource for higher-voltage projects. Questions about electrical panel safety are also covered in detail there.
Inspections, troubleshooting, and passing on the first attempt
The inspection stage is where good preparation pays off and cutting corners becomes expensive. Knowing exactly what inspectors look for in Edmond and OKC puts you in control.
During rough-in, the Oklahoma City inspection process focuses on work that will be hidden after drywall. During final, inspectors verify everything is operational and properly labeled. Both cities follow this two-stage sequence.
Edmond’s inspectors specifically check wire routing and support, box sizing, grounding, separation of wiring types (line voltage from low voltage), and AFCI/GFCI identification at rough-in. At final, they check device operation, panel labeling, and outdoor cover hardware.
What inspectors look for at rough-in:
- Wire secured every 4.5 feet and within 12 inches of boxes
- Nail plates protecting wire within 1.25 inches of stud edge
- Boxes flush with finished wall surface (or projected correctly)
- Proper box fill, no overfilling
- Grounding conductors present and connected
- AFCI/GFCI circuits clearly identified
What inspectors look for at final:
- All devices properly installed and operational
- GFCI outlets tested and functioning in required areas
- AFCI breakers installed for bedroom and living area circuits
- Panel directory complete and legible
- Outdoor receptacles have in-use weatherproof covers
- No exposed wiring or open knockouts in panel
Common reasons inspections fail:
| Failure reason | How to prevent it |
|---|---|
| Wire not secured properly | Staple every 4.5 feet, within 12 inches of boxes |
| Missing GFCI or AFCI protection | Map room types before purchasing devices |
| Overfilled electrical boxes | Calculate box fill before installation |
| Incomplete panel labeling | Label every circuit before rough-in |
| Missing weatherproof covers | Install in-use covers on all outdoor receptacles |
| Bare ground wires not terminated | Connect all grounds at boxes and panel |
Re-inspection fees in Edmond add real cost to failed jobs. Beyond the fee itself, you lose scheduling time while waiting for the reinspection date. In busy construction seasons, that wait can be two weeks or more. Passing the first time is not just satisfying, it’s financially smarter.
For a complete pre-inspection walkthrough, use our electrical inspection checklist before you call for any inspection.
Why following the process beats shortcuts: Lessons from Edmond & OKC projects
Here’s something nobody tells you when you’re standing in the hardware store with a cartful of Romex: the permit and inspection process is not bureaucratic red tape. It’s actually the most efficient path to a finished, insurable, and safe project.
We’ve seen this pattern consistently across Edmond and OKC projects. The jobs that take twice as long and cost twice as much almost always started with someone deciding the permit step could wait, or that a rough-in inspection wasn’t necessary because “the walls were going up anyway.” The wall goes up, the inspector catches the unpermitted work later during a sale or remodel, and now you’re paying to tear open finished walls, correct violations, and pay for re-inspection. That’s a painful and expensive lesson.
There’s a false economy in skipping the process. You save a few days up front and spend weeks fixing it later. Worse, unpermitted work can invalidate a homeowner’s insurance claim if a fire or failure is traced to the unlicensed modification. Insurance companies do ask these questions after a loss.
For DIYers specifically, staged inspections are actually your best friend. A licensed inspector looking at your rough-in work before the wall closes catches the mistake before it’s buried and dangerous. Think of it as a free expert review of your work at the most critical point in the project. Use it.
The practical rule we follow: always budget time for rough-in inspection approval before scheduling drywall. Keep the workflow linear and sequential. The temptation to move faster by overlapping stages is where problems hide.
Refer to our code compliance experience for a deeper look at how following the process actually speeds up complex projects rather than slowing them down.
Get expert help with your electrical installation in Edmond & OKC
Some projects are genuinely within reach of a careful, permit-pulling homeowner. Others, like panel upgrades, service changes, EV charger installations, and whole-home rewires, are high-stakes work where a mistake has serious consequences.

If your project falls into that second category, or if you’ve gotten partway through and hit a wall, working with a licensed local electrical contractor is the fastest way to get it done right and inspected without delays. Shepherd Electrical serves homeowners and businesses throughout Edmond and the Oklahoma City metro with installations, upgrades, and code-compliant work backed by real inspection experience. Explore our full range of OKC and Edmond electrical services or get guidance on how to find the right contractor for your specific job. Getting the right professional involved early is almost always cheaper than fixing it later.
Frequently asked questions
Do I need a permit to replace outlets or light switches in Edmond or Oklahoma City?
No, like-for-like device replacement at the same location without circuit modification is generally permit-free in both Edmond and Oklahoma City.
What are the most common reasons electrical inspections fail?
Top reasons include improper wire sizing, missing GFCI/AFCI protection, unsafe box fill, poor grounding, and incomplete labeling, all of which the rough-in inspection checks cover as standard items.
How do staged inspections work for electrical installations in Oklahoma City?
You must pass a rough-in inspection before your wiring is concealed, then a final inspection after all devices are installed. The city uses this two-step sequence to verify safety at both hidden and visible stages of the work.
What happens if my work fails an electrical inspection in Edmond?
You’ll need to correct all flagged issues and schedule a re-inspection. The Edmond fee schedule confirms that re-inspection fees apply when work is defective or incomplete at the time of the visit.
Is it safe to handle minor electrical installations yourself?
Simple replacements at existing locations can sometimes be done carefully by an informed homeowner, but any work involving new circuits, panel connections, or code-required protection devices is safest when handled by a licensed electrician.
Recommended
- Your complete guide to residential electrical installation
- Top electrical maintenance tips for Edmond & OKC homes
- Home electrical inspection guide: what homeowners must know
- Residential electricians: duties, costs & safety in Edmond
Need help with this at your home?
Shepherd Electrical helps Edmond and OKC metro homeowners with residential installs, wiring upgrades, fans, lighting, and electrical improvements. Free estimates are available, and workmanship is backed by a lifetime guarantee.